Jesus Vigo takes a look at three services that allow for greater control and flexibility when managing a disaster recovery plan for Apple's OS X Server.
Backing data is both a blessing and a curse. It consumes time, money, and energy, so it's no wonder that approximately 30% of IT professionals view data backups as "not an efficient use of their time."
Similar to an insurance policy, you wonder why you continue to pay for it until the day disaster strikes and it saves your precious data. Then you ask yourself what you would have done without it!
The truth is that it does not have to be a curse. Backup solutions exist that neither tax the wallet nor your time. And while cloud-based services have become synonymous with storage, in some cases, it's not only better to manage your own data locally, but it may even be a requirement, such as complying with HIPAA regulations and confidential documents.
Let's take a look at three services that allow for greater control and flexibility when managing a disaster recovery plan for Apple's OS X Server.
Apple's Time Machine is the de facto standard for OS X Server. It's included in all modern versions of OS X Server and functions as a service by which all of your networked nodes can continuously backup their data.
An elegant UI allows the service to be configured to meet your current needs, and it can be scaled out over time by adding storage disks or NAS devices as needed. Furthermore, each user backs up to his or her own independent folder, ensuring data security and file versioning for added protection.
One downside to Time Machine is that backups, by default, are limited to the LAN. Since the service relies on the Bonjour protocol, it's not routable, which means off-site backups over the WAN are not possible unless a VPN connection is established first. Depending on the data to back up and the internet connection present, it may be a time-intensive process.
This is one of the original providers in cloud storage and backed by EMC, a pioneer in the storage industry. Mozy has developed into a paid service model that offers backup services to the cloud over the internet and NAS/SAN devices hosted locally* on the LAN.
In addition to this, data is stored using military-grade encryption with various security methods, including use of your own corporate key, which allows data decryption only by the corporation.
Other enterprise benefits include Single Sign-On (SSO), Active Directory integration for federated-identity providers, and customizable installers for deployment using 3rd-party management suites.
Mozy has a variety of tiered plans to meet the demands of the SMB or scale throughout your enterprise. However, it should be noted that this level of protection has a steep yearly cost per desktop in your organization.
CrashPlan, by developer Code42, has an easy-to-use, intuitive layout across all service tiers. Its pricing plans offer an equally straightforward approach that makes selecting the appropriate plan a cinch.
Though CrashPlan is a relatively newer offering in the storage services pool, baked right in is some impressive services, such as full HIPAA, SOX, and a full-assortment of data-retention hold compliances. Unlimited storage for backing up all user data and an industry first -- Triple Destination Protection -- allows for backing up offsite to networked devices** (servers, NAS, or other nodes) over the WAN, in addition to onsite backup to NAS/SANs and cloud backup to their encrypted servers.
Both Pro and Enterprise versions also include dashboard access for monitoring the backup statuses for all end-points and administrative features that include bandwidth throttling, QoS management, and centralized auditing to ensure that backups are being completed without compromising file integrity.
While CrashPlan offers many identical features across all tiers, some are noticeably missing (such as offsite backup destination to another node/server over WAN) from the Pro tier, while being present in both the Free and Enterprise tiers.
HTML5 offers new tags and attributes that provide more power, efficiency, and flexibility for your Web development. Here are 10 tags you'll want to check out. HTML5 brings a host of new elements and attributes to allow developers to make their documents more easily understood by other systems (especially search engines!), display data more uniquely, and take on some of the load that has required complex JavaScript or browser plug-ins like Flash and Silverlight to handle. Here are 10 new items in HTML5 that will make it easier for you to write your Web sites.
1: <video> and <audio>
One of the biggest uses for Flash, Silverlight, and similar technologies is to get a multimedia item to play. With HTML5 supporting the new video and audio controls, those technologies are now relegated to being used for fallback status. The browser can now natively display the controls, and the content can be manipulated through JavaScript. Don't let the codec confusion scare you away. You can specify multiple sources for content, so you can make sure that your multimedia will play regardless of what codecs the user's browser supports.
2: <input> type attributes
The venerable <input> element now has a number of new values for the type attribute, and browsers do some pretty slick things depending on its value. For example, set type to "datetime" and browsers can show calendar/clock controls to pick the right time, a trick that used to require JavaScript. There is a wide variety of type attributes, and learning them (and the additional attributes that go with some of them) will eliminate the need for a lot of JavaScript work.
3: <canvas>
The <canvas> tag gives HTML a bitmapped surface to work with, much like what you would use with GDI+ or the .NET Image object. While <canvas> isn't perfect (layers need to be replicated by using multiple canvas objects stacked on top of each other, for example), it is a great way to build charts and graphs, which have been a traditional weak spot in HTML, as well as custom graphics. And that is just a start!
4: <header> and <footer>
The <header> and <footer> tags are two of the new semantic tags available. These two tags do not get you anything above and beyond <div> for the actual display. But they will reap long-term rewards for your search engine efforts, since the search engines will be able to tell the difference between "content" and things that are important to the user but that aren't the actual content.
5: <article> and <section>
The <article> and <section> tags are two more semantic tags that will boost your search engine visibility. Articles can be composed of multiple sections, and a section can have multiple articles. Confusing? Not really. An article represents a full block of content, and a section is a piece of a bigger whole. For example, if you are looking at a blog, the front page might have a section for the listing of all the posts, and each post would be an article with a section for the actual post and another for comments.
6: <output>
The new <output> tag is unique, in that it expects its content to be generated dynamically with JavaScript. It has a value attribute, which can be manipulated through the DOM with JavaScript to change what is displayed on the screen. This is much more convenient than the current ways of doing things.
7: <details>
It seems like every Web site needs to have an expanding/collapsing block of text. While this is easy enough to do with JavaScript or server-side code, the <details> tag makes it even easier. It does exactly what we've all been doing for years now: makes a simple block that expands and collapses the content when the header is clicked. The <details> tag does not have widespread support yet, but it will soon.
8: <figure> and <figcaption>
<figure> is a container for content (typically images, but it can be anything), and <figcaption> (which gets put inside the <figure> tag) provides a caption or subtitle for the contents of the <figure> tag. For example, you could have four images representing charts of sales growth within a <figure> tag, and a <figcaption> with text like "Year-to-year sales growth, 1989 - 1993." The images would be shown next to each other with the text running below all four.
9: <progress>and <meter>
<progress> and <meter> are similar. You use <progress> for a task or a "measure how complete something is" scenario. It also has an indeterminate mode for something that has an unknown duration (like searching a database). The <meter> tag is for gauges and measurements of value (thermometers, quantity used, etc.). While they may look alike on the screen in many cases, they do have different semantic meanings.
10: <datalist>
The <datalist> tag acts like a combo box, where the system provides a pre-made list of suggestions, but users are free to type in their own input as well. There are tons of possible uses for this, such as a search box pre-populated with items based on the user's history. This is another one of those things that currently requires a bunch of JavaScript (or JavaScript libraries) to handle but that can be done natively with HTML5.
Sometimes you have the perfect image to draw or paint but it's too small. An easy way to transfer the image to your drawing paper or canvas and increase it's size to what you want, you can use a grid. In this tutorial, I'm going to show you two easy ways to blow up an image and get it ready for the final art making process.
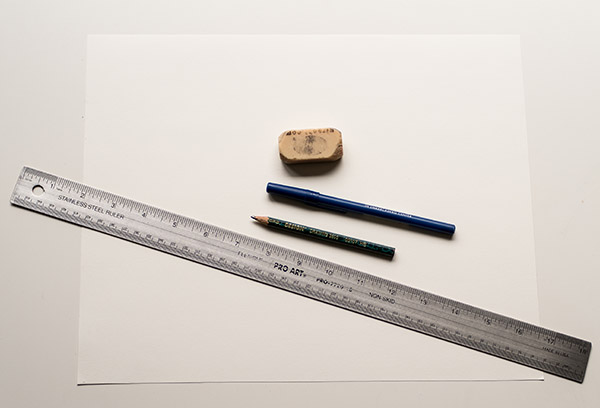
What You Will Need
Paper or canvas
Ruler
Pencil
Pen
Eraser
1. How to Make a Grid Traditionally
Step 1
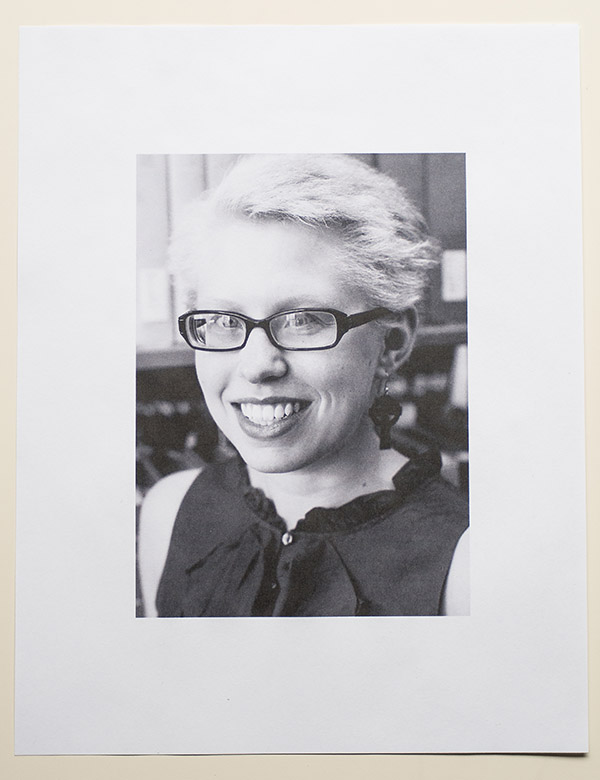
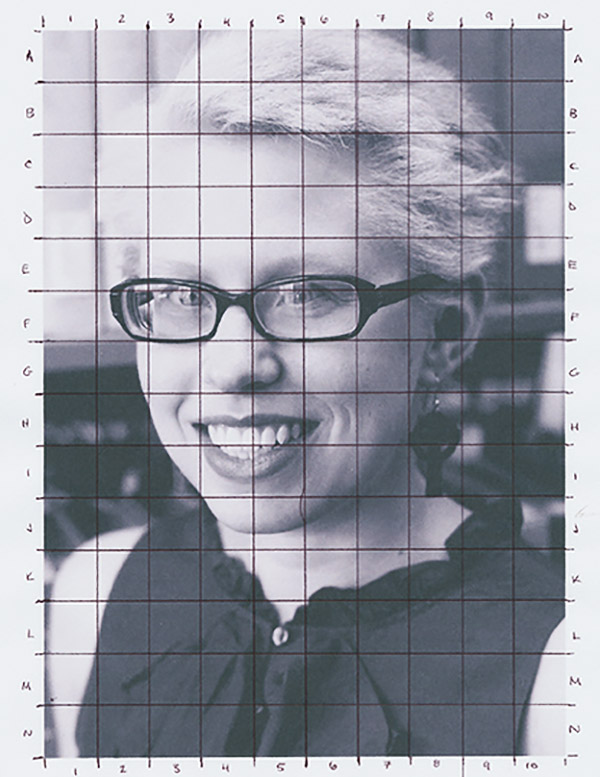
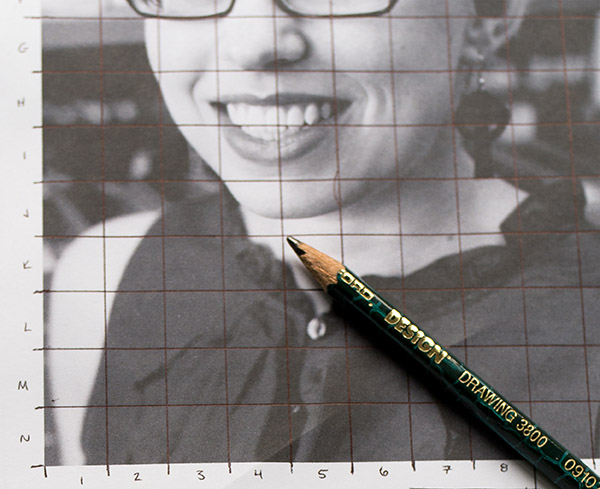
Print out your photograph at a reasonable size. It doesn't have to be gigantic but you need to be able to see the details so you can copy them. I prefer to print it out in black and white so that it's easier to see the edges. My portrait is 5" x 7".
Step 2
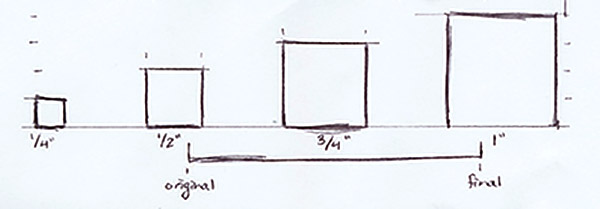
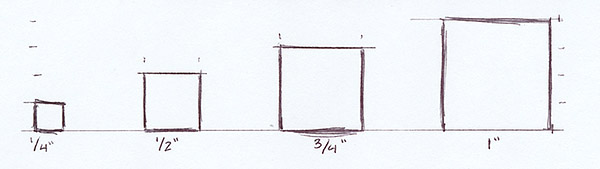
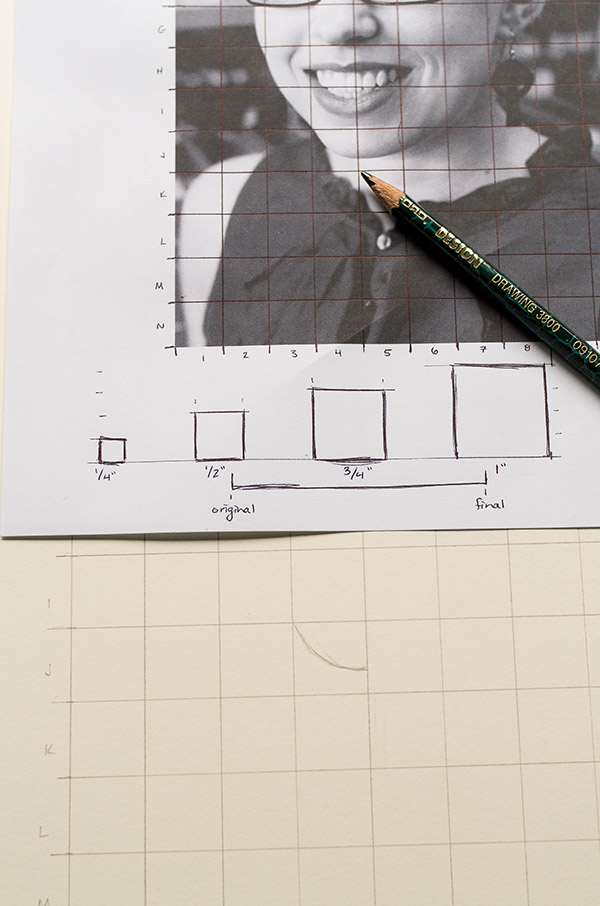
Figure out an appropriate size of the grid spacing. For most images, I prefer 1/2" between each line but sometimes 1/4" or 3/4" works best. Here I'm going to use 1/2".
Step 3
Draw the grid out on your printed photo. I prefer to use pen here so that it's easier to see on top of the photograph.
Step 4
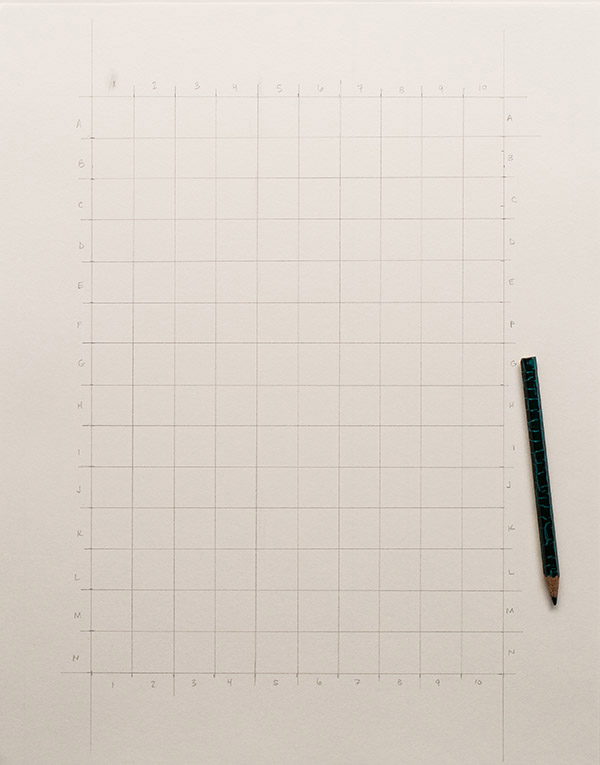
Label the boxes on the sides of the grid. I prefer to go A, B, C, etc. on the left and right sides and 1, 2, 3 on the top and bottom. Labeling the boxes makes it much easier when you get into the middle of the grid and you start getting lost.
2. How to Make a Grid Digitally
Step 1
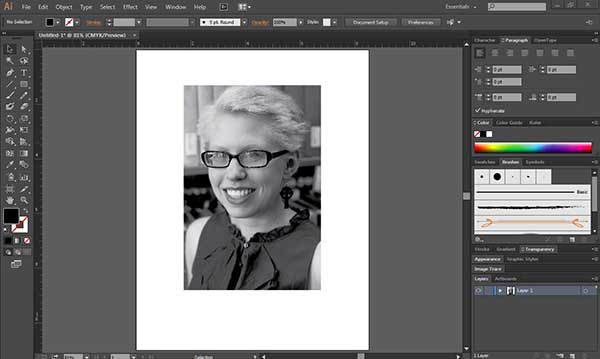
Place your photo in Adobe Illustrator at a reasonable size. It doesn't have to be gigantic but you need to be able to see the details so you can copy them. I prefer to use a black and white photo so that it's easier to see the edges.
Step 2
Click and hold the Line Segment Tool. Choose the Grid Tool. Here you can see the grid tool as the fourth image down on the left toolbar under the pen tool. Then draw a box over the image.
Step 3
Holding down the mouse, use the arrow keys to create as many grid boxes as you want. I used the ruler guides to make 1/2" boxes.
Step 4
Now you can either print out this image or leave it up on your computer screen.
Step 5
If you print out the picture, label it according to the same way in the steps above. If you leave it on your screen, use the text tool to label the grid. I prefer to go A, B, C, etc. on the left and right sides and 1, 2, 3 on the top and bottom. Labeling the boxes makes it much easier when you get into the middle of the grid and you start getting lost.
3. Prepare Your Drawing Paper (or Canvas)
Step 1
Determine the final size of your drawing. Here you'll have to do some quick calculations. Are you doubling the photograph? Quadrupling? One and a half?
Step 2
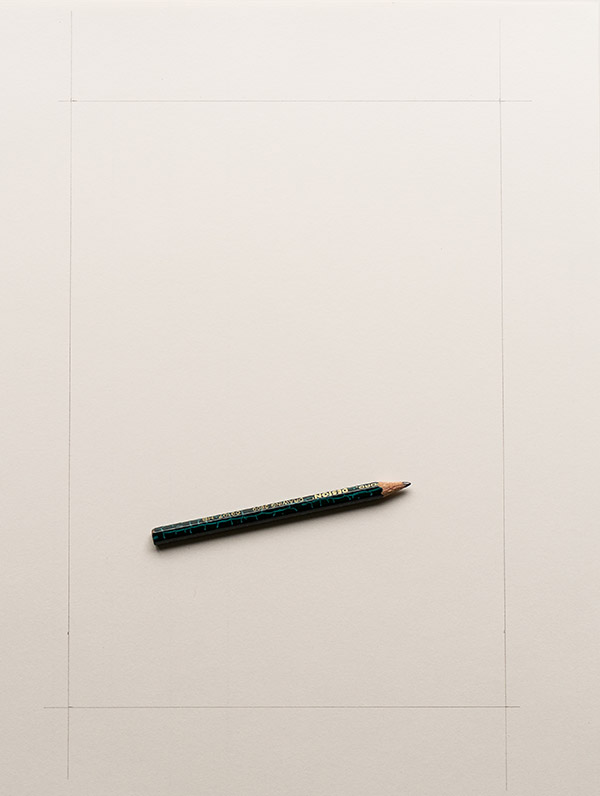
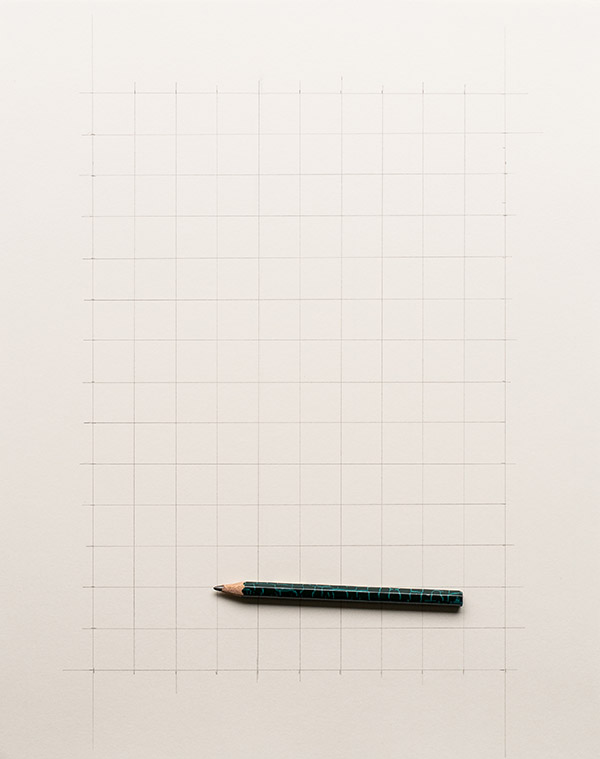
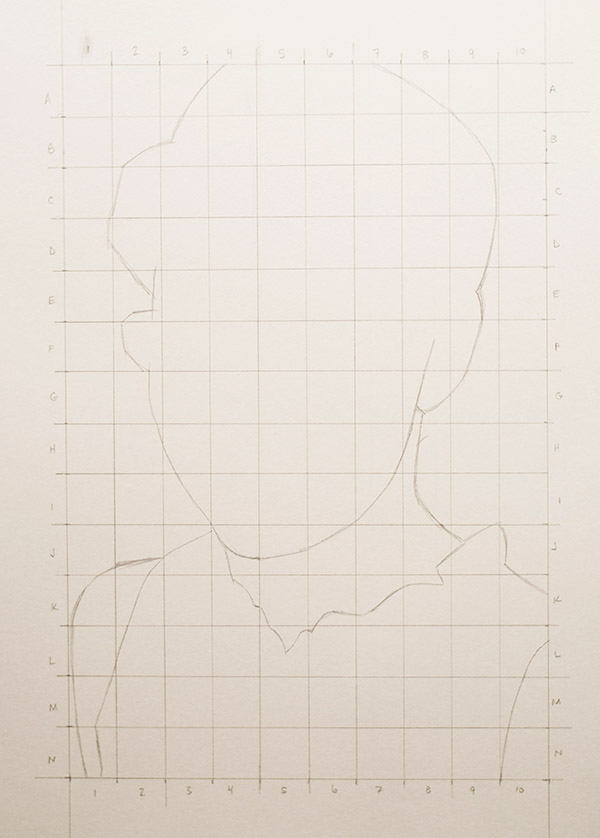
Measure and draw out the outer rectangle/square of your final drawing. Here I'm making the final drawing twice as big as my original 5" x 7" photograph so my outer box is 10" x 14".
Step 3
Use your ruler to determine the new size of the grid. If you're doubling the size of the photograph and your grid squares are 1/4" by 1/4", then your new grid squares will be 1/2" by 1/2". Since my original grid was 1/2" boxes, my final grid will be 1" boxes.
Step 4
Draw out your final grid on your drawing paper.
Step 5
Label your new grid identical to the smaller grid on the photograph.
4. Begin Drawing
Step 1
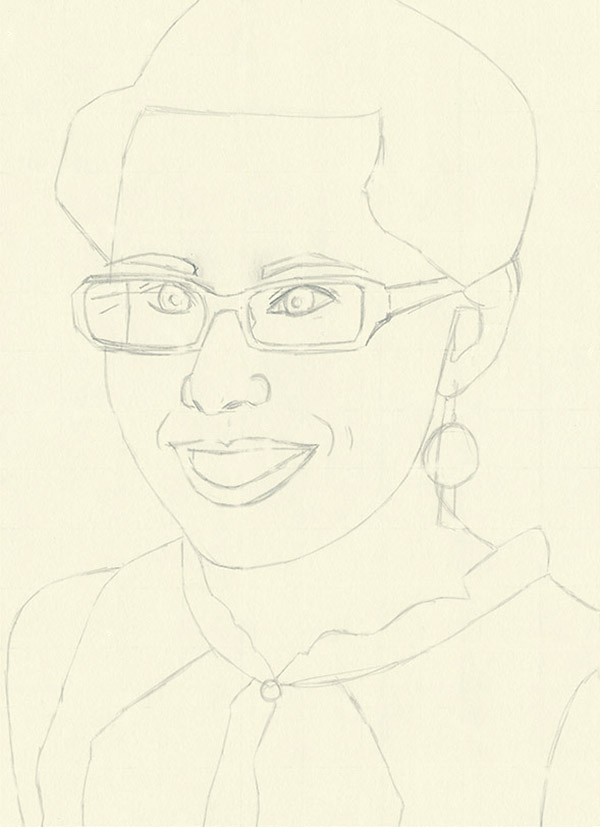
Pick where to start. I like to start at a recognizable point. Perhaps it's the bottom of a chin or the part in someone's hair. Here I'm starting at the bottom left of the chin.
Step 2
Look at the box that contains your starting point and find the corresponding box on the bigger paper. For me, that's box J4. Copy the outline line in that box. I drew in the curve of the chin in box J4.
Step 3
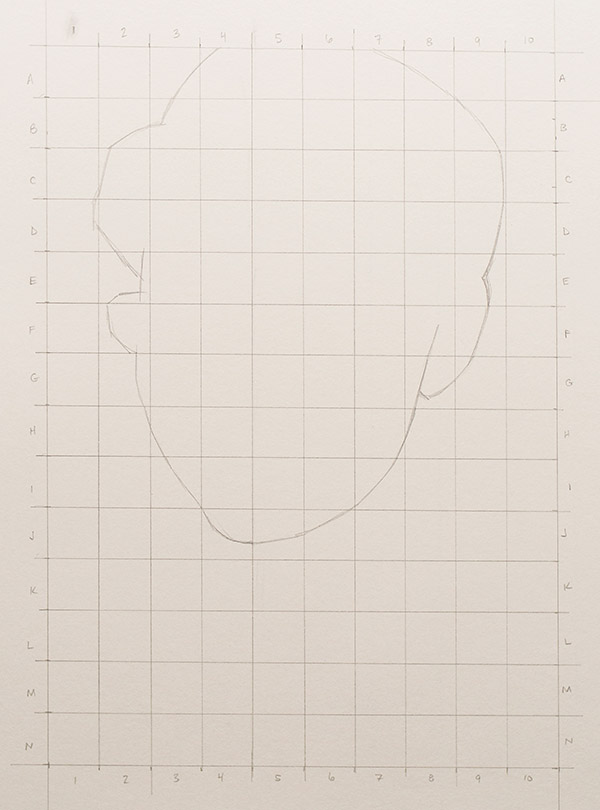
Follow the outline from box to box, using the grid labels to help you know where you are. I usually work left to right and slowly make my way around the head first. A good tip is to look at where the outline starts and ends in each box. Is it touching the middle of the outer grid box line or the corner? It becomes a bit more mathematical when you do it this way but you won't get lost and you'll be closer to the actual image.
5. Draw All the Large Shapes
Step 1
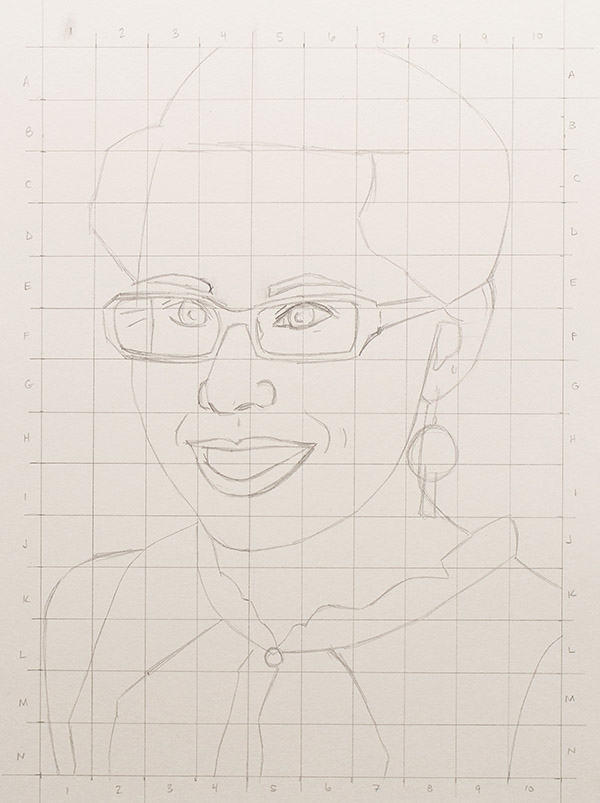
Continue drawing until you have all of the big shapes penciled in. If your lines don't meet up in the end, go back to the labels on the boxes and double-check yourself box by box. By big shapes I mean the outlines of the people or landscape or animal that you're drawing.
6. Begin Adding the Details
Step 1
Now that you have all the big shapes drawn in, begin to pencil in the smaller details like hair lines, eyes, ears, etc.
Step 2
Keep looking at the grid labels to check that you're making the details in the right boxes. Generally if you're going to get lost, you'll do it here.
7. Check Box By Box
Step 1
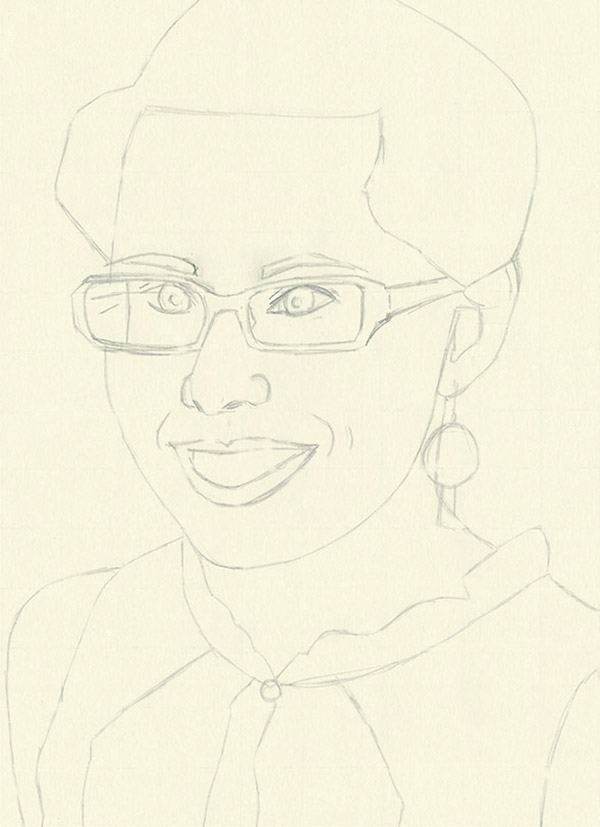
Now that your drawing is finished, check over the drawing box by box. This is the boring part but you want to catch any mistakes now and not once you start painting or inking.
8. Erase the Grid
Step 1
Go in with an eraser and begin to erase the grid lines as well as you can. This may take a very small eraser in some parts.
You're Ready to Now Create Your Masterpiece!
Now that you have your image at its final size, you can start painting, inking, or penciling it into a finished piece of artwork.
Last time we were talking about Mustelidae family, narrowing it to bigger animals like wolverines, badgers, otters and martens. Today we're going to take care of smaller members of the family, including the tiniest carnivore ever, the least weasel. Fortunately (or not), all the weasels (as we're going to call members of genus Mustela) are very similar, so you can learn how to draw a general weasel body and then bring in the details of one of the five species. Five animals in one - that's pretty good deal, isn't it? Let's get started!
What Does a Weasel Look Like?
Body Features
You've probably got a well-established image of a weasel in your mind, but let's specify it:
Weasels have long, thin, flexible body;
Long, slim neck is finished with a small head;
The snout is short and tapered;
The tail is long, stick-shaped;
Paws are small, with medium-length, non-retractable claws;
Legs are short, they enable both digitrade (fingertips) and plantigrade (whole hands/feet) locomotion.
The arched back may conceal a bit the true shape of a weasel's barrow. Although so straight and even back may seem odd, it's completely normal for a weasel. Don't try to create curved barrow characteristic like in cats or dogs - weasels are meant to look like a tube with legs, that's not a mistake!
Weasels run using so called "bounding gait". It's quite primitive way of locomotion, but it works very well for these slim, flexible bodies and short legs of theirs. Bounding gait means all the legs are in the same phase of running (pushing, stretching) at roughly the same time. In other words, when one leg goes to inside, all of them go to inside (and vice versa).
Here comes the slower version:
This was a skeleton you can use to create a basic pose for your weasel. You can easily add simplified muscle masses to it to create a body. (if you're having problems with the pose, check the importance of drawing poses.)
Head Proportions
When drawing the head for a weasel, you can think of it as a kitten. Eyes place below the middle line of the head circle will give your animal a cute, innocent look.
Weasel head - front view
In the side view it's important to stress the short snout and streamline shape of the skull.
Weasel head - side view
Feet
Weasels' paws are absolutely adorable! They're like little hands with fragile fingers and soft pads. When you compare them to cat paws, it becomes obvious that whole "hands", not only fingertips can be used for locomotion.
Weasels' feet are so tiny that it's better not to put too much detail in them - they're a detail themselves! However, it's important to create a proper shape for them. They're quite easy to draw both in plantigrade and digitrade position: (the "thumb" isn't shown below, since it's a left paw and it wouldn't be visible anyway)
Drawing weasel paw in plantigrade and digitrade position
But that was just a "universal" weasel. Let's take a look at the actual species!
Weasels Comparison
The Least Weasel
The term "weasel" is usually used for the smallest member of mustelidae, the least weasel. It's no bigger than a rat, but it's still a blood-thirsty predator. It can be recognized by its short tail, chocolate-brown coat and cream underside with an irregular border in-between. The body is classically slim and long.
The least weasel
The head of this weasel was used for the template above. The eyes are big, black and round, the nose is small, the ears are rounded and rather flat. It's characteristic for the least weasel that the light underside reaches the chin only. A brown patch, less or more merged with the rest of the pelt can be observed on the sides.
In colder areas the least weasel may turn completely white in winter.
The least weasel - winter coat
The Stoat
The stoat is a bit bigger than the least weasel, but very similar to it in general appearance. The most prominent difference is longer tail with a black tip and a straight and clear line between the colors of the fur.
Stoat
The head is almost identical to the least weasel, but the light underside reaches the mouth and creates a neat patch under the nose.
The stoat in its winter coat is called ermine. The tip of the tail stays black, what makes it easy to distinguish from the least weasel.
Stoat - winter coat
The Mink
The mink is similar to otter in behavior and looks. It's semi-aquatic, with water-resistant fur and slightly webbed paws. A few of color variations of minks have been developed for fur production, but the original, natural one is dark brown.
Mink
The head seems rounder than with other weasels, with slightly smaller eyes. The light patch on the mouth appears on both lips for the European mink and on the lower lip only (or not at al) for the American mink.
The Polecat
The polecat is the origin of well-known ferrets. It's a big, heavy weasel with interesting fur pattern - dark brown with gray or slightly blond patches. Its silhouette is a bit stockier on the back, less tube-like.
Polecat
The head of polecat reminds me of a mini-wolverine with light snout and cuter eyes. The black mask around them contrasts with light forehead.
The Ferret
The ferret is a domesticated form of polecat. In the process of domestication the look has also changed, and the ferret usually looks lighter, less contrasting. Ferrets can also have one or more light-colored paws, and a lot of various, polecat-unrelated color forms.
Ferret
The ferret can be easily distinguished by its pink nose and ear-insides.
The difference between the polecat and the ferret isn't always as clear as shown below, but in drawing you can stick to it for clarity.
Polecat - ferret comparison
The differences between weasels are the most easily observable when all the silhouettes are put next to each other:
The same applies to the head shape:
That's All Folks!
Now you're never going to confuse the least weasel with stoat again, and you're one step closer to becoming an animal expert. So, what are you waiting for? Grab a pencil and draw a cute weasel!
Pixion is a state of the art post production facility that offers 360 degree creative and technological services with the cutting edge expertise to cinematic masterpieces. Pixion has been always enthusiastic about new projects with creative ideas and Bhoothnath Returns is one amongst their masterpieces.
Pixion, who is renowned for their work in movies like Grand Masti, Taalash, Son of Sardar, Barfi!, Chasme Badoor,Don 2 and ABCD recently delivered VFX for Bhoothnath Returns. It has delivered stunning VFX shots for this film.
Testimonials
“We were looking for a logo with a touch of modernism. Mitesh sata our needs and produced a stunning design. When feedback was needed, new versions of the logo or any modifications were made very quickly. We really appreciated Mitesh flexibility and efficiency. It’s great to work with someone so open-minded and responsive. Thank you!”
About
Mr Mitesh sata(CEO)
WEB : www.pixelcreation.in
Email : pixellcreation@gmail.com